Portrait Photography Techniques for Stunning Results
Portrait photography is about more than capturing someone's appearance. A great portrait can communicate personality, emotion, and mood through lighting, composition, facial expressions, and carefully chosen backgrounds.
Whether you're using a professional camera or a smartphone, understanding a few essential techniques can help you create more natural, expressive, and visually appealing portraits. You don't need expensive equipment to get started. Learning how to work with available light, guide your subject, and choose the right perspective can make a noticeable difference.
In this guide, we'll explore practical portrait photography techniques that help beginners and experienced photographers improve their results.
Make the Most of Natural Light
Lighting is one of the most important elements of portrait photography. It influences skin tones, shadows, contrast, and the overall atmosphere of an image.
Natural light is a good starting point because it's widely available and easy to experiment with.
Use Window Light Indoors
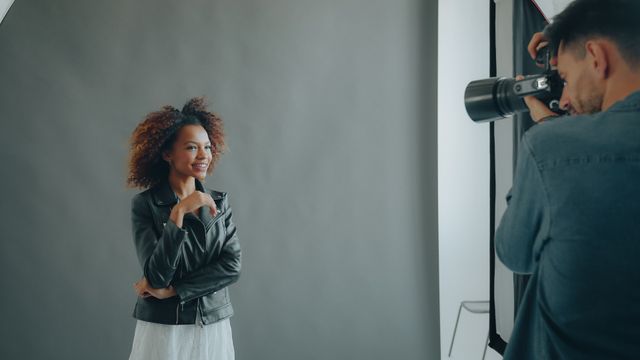
Position your subject near a window so that soft light falls across their face. Side lighting can add depth and dimension, while more frontal lighting creates a softer, more even appearance.
Avoid placing your subject directly in harsh sunlight streaming through the window. A sheer curtain can help diffuse the light and reduce strong shadows.
Photograph During Golden Hour
Golden hour is the period shortly after sunrise or before sunset. The light is often warmer and softer than midday sunlight, making it useful for outdoor portraits.
Try positioning the sun behind your subject for a gentle backlit effect. You can then use a reflector or nearby bright surface to bring detail back into the face.
Work With Shade
On sunny days, open shade can provide more even lighting than direct sunlight. Look for a shaded area near a building, under a tree, or beside a wall that reflects light onto your subject.
Check the background, too. A brightly lit area behind someone standing in deep shade can create distracting contrast.
Choose the Right Camera Settings
Camera settings affect how much of the portrait is in focus, how movement is captured, and how bright the final image appears.
|
Setting |
What It Controls |
Practical Starting Point |
|
Aperture |
Depth of field and background blur |
Around f/1.8–f/2.8 for a single-subject portrait, if your lens supports it |
|
Shutter speed |
How motion is captured |
Around 1/125–1/250 second for a relatively still subject |
|
ISO |
Sensitivity setting affecting image brightness and noise |
Start at ISO 100–400 in good light and increase when needed |
|
White balance |
The color temperature of the image |
Use auto white balance or a suitable preset, then check skin tones |
|
Focus mode |
How the camera maintains focus |
Use eye detection or single-point focus for a still subject |
These are starting points rather than strict rules. Adjust them according to your lighting, lens, subject movement, and creative goals.
For portraits with a blurred background, use a wider aperture when available. However, very shallow depth of field can leave one eye sharp while the other appears soft, especially when the subject's face is turned at an angle.
Make sure the eyes are in focus, and review the image at full size when possible.
Pay Attention to Composition
Composition determines how viewers look at a photograph and what they notice first. A thoughtful arrangement can make even a simple portrait feel intentional.
Try the Rule of Thirds
Imagine dividing your frame into three equal sections horizontally and vertically. Positioning your subject near one of these lines can create a balanced composition, especially when you want to include some of the surrounding environment.
For a close-up portrait, placing the eyes near the upper horizontal line can be a useful starting point.
Experiment With Framing
Doors, windows, arches, and tree branches can create natural frames around a subject. These elements help guide attention toward the face and add depth to the scene.
Make sure framing elements don't overlap awkwardly with the subject's head or distract from their expression.
Leave Space in the Direction of the Gaze
If your subject is looking to one side, leaving some empty space in that direction can make the composition feel more natural.
You can break this rule deliberately for a tighter or more dramatic portrait. The key is to understand how the placement of your subject affects the image.
Use Backgrounds That Support the Subject
A distracting background can weaken an otherwise strong portrait. Look for backgrounds that complement the subject without competing for attention.
Simple walls, greenery, architectural details, and softly blurred city scenes can all work well. Pay attention to bright objects, signs, poles, or branches that appear to extend from the subject's head.
Changing your position by just a few steps can sometimes remove these distractions.
For a more professional look, create distance between your subject and the background. This can help separate the person from their surroundings, particularly when using a wider aperture or a longer focal length.
A background doesn't always need to be plain. Environmental portraits can tell a story by including a person's workplace, creative space, or favorite location.
Help Your Subject Feel Comfortable
Technical skills matter, but the subject's expression often determines whether a portrait feels genuine.
Many people become uncomfortable when they know a camera is pointed at them. Instead of immediately asking them to pose, start a conversation and explain what you're trying to achieve.
Give simple, specific directions rather than asking someone to "look natural."
For example, you can ask them to:
- Turn their shoulders slightly away from the camera.
- Shift their weight onto one leg.
- Look toward a nearby object instead of directly into the lens.
- Walk slowly while you take a few frames.
- Relax their hands by holding a small object or resting them naturally.
Take several photographs during small movements rather than expecting the perfect expression in a single frame.
For professional headshots, a direct gaze and relaxed posture can communicate confidence. For lifestyle portraits, movement and candid interaction may create a more personal result.
Experiment With Angles and Focal Lengths
The camera's position changes how facial features and body proportions appear.
For many traditional portraits, placing the camera around eye level creates a familiar, natural perspective. Moving slightly above or below eye level can produce different effects, depending on the subject and composition.
Lens choice matters as well. A very wide-angle lens used close to the face can exaggerate features nearer to the camera. Stepping back and using a moderate telephoto focal length often produces a more balanced perspective.
On a full-frame camera, lenses around 50 mm to 85 mm are popular portrait choices. On crop-sensor cameras, the field of view differs, so choose a lens based on the framing you want.
Don't assume one focal length works for every situation. Environmental portraits may benefit from wider lenses, while tight headshots often work well with longer ones.
Capture Emotion Through Small Details
A portrait can feel more engaging when it communicates something about the person rather than simply recording their appearance.
Watch for subtle changes in expression, including a genuine smile, a thoughtful glance, or a moment of concentration. Give your subject time to settle into the session, and keep shooting when appropriate between formal poses.
Hands, posture, clothing, and personal objects can also add meaning. A musician holding an instrument or an artist working in a studio can reveal more about the subject's identity than a plain headshot alone.
Try to avoid directing every movement. A little freedom can create expressions and gestures that feel more authentic.
Edit Portraits Without Overdoing It
Editing can improve exposure, contrast, color, and overall consistency. The goal is to support the portrait, not make the person look unrecognizable.
Start with basic adjustments:
- Correct exposure and recover highlights where possible.
- Adjust white balance so skin tones look natural.
- Fine-tune contrast and shadows.
- Crop the image to strengthen the composition.
- Apply subtle sharpening and noise reduction when needed.
Retouching can remove temporary distractions, but excessive skin smoothing may make a face look artificial. Preserve natural texture and avoid changing defining features unless the subject has specifically requested that type of edit.
If you're editing a series of portraits, keep color and exposure reasonably consistent so the images feel like part of the same session.
Conclusion
Creating stunning portraits requires a combination of technical knowledge, visual awareness, and communication. Soft lighting, thoughtful composition, suitable camera settings, and a clean background can provide a strong foundation. Helping your subject feel comfortable allows their personality to come through.
Start by mastering one technique at a time. Experiment with window light, try different angles, and review your images to understand what works. With regular practice, you'll develop a style that captures people in a way that feels both natural and visually compelling.
Frequently Asked Questions
Use a wider aperture, move the subject farther from the background, and choose a suitable focal length. The amount of background blur also depends on camera distance, subject distance, and sensor size.


Was This Article Helpful?
Click on a star to rate it!
Thank you for your vote!
Average Rating: 0/5 Votes: 0
Be the first to rate this post!

Expert in backend development and database architecture. Specializes in building, optimizing, and maintaining scalable PHP applications, designing efficient database structures, and ensuring data integrity and performance. Experienced in working with relational databases, writing optimized queries, and integrating backend systems with APIs and business logic to support reliable, high-performance web solutions.
View LinkedIn ProfileLatest Posts
Lifestyle Design for Personal Freedom
Outdoor DIY Projects for Your Backyard
Fashion Weeks and Their Cultural Impact