DIY Home Projects: Tips and Tutorials for Improving Your Space
Whether you’re a seasoned DIYer or just starting out, home improvement projects are a great way to add personal style to your living space while also boosting its functionality. From simple updates to more advanced undertakings, DIY projects allow you to take control of your home’s design and make it truly yours. In this guide, we’ll explore some easy, creative, and cost-effective DIY home projects, along with tips and tutorials to help you get started.
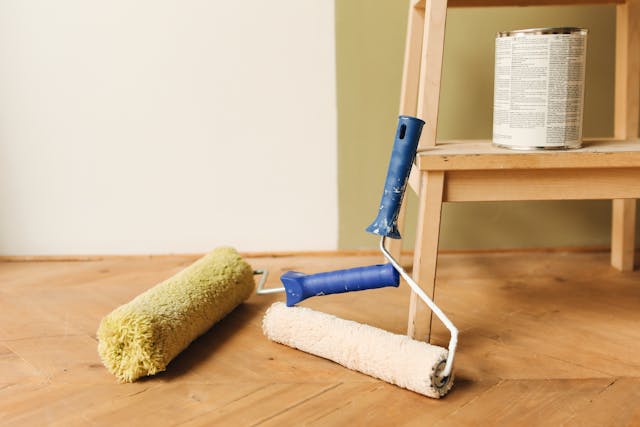
Freshen Up Your Walls with Paint
One of the simplest and most affordable ways to transform a room is by painting the walls. A fresh coat of paint can breathe new life into any space, whether you’re looking to create a relaxing vibe with soft neutrals or energize the room with bold colors.
Tips for Successful Painting:
-
Prep the Surface: Clean the walls and fill any holes or cracks before you begin. Sand the patched areas for a smooth finish.
-
Use Painter’s Tape: Tape off edges and trim to ensure crisp, clean lines.
-
Choose the Right Paint Finish: Flat finishes are great for hiding imperfections, while satin and gloss finishes are more durable and easy to clean.
-
Use a Quality Roller: A high-quality roller ensures even coverage and reduces streaking.
Tutorial:
-
Step 1: Start by cutting in the edges with a brush. Paint around the trim, corners, and ceiling.
-
Step 2: Use a roller for the larger areas. Apply paint in a “W” pattern for even coverage.
-
Step 3: Let the first coat dry, then apply a second coat if necessary for a more vibrant finish.
Create a Statement Wall with Wallpaper or Stencils
If you want to add visual interest without committing to painting an entire room, a statement wall can make a big impact. Consider wallpaper, removable wall decals, or stencils for a bold look.
Tips for Wallpapering:
-
Prep the Wall: Make sure your wall is clean and dry. If you’re using peel-and-stick wallpaper, test it on a small section first.
-
Measure and Cut: Measure the wall carefully before cutting wallpaper to size, ensuring you have enough for the entire wall.
-
Align Pattern: If using patterned wallpaper, be mindful of aligning the patterns as you apply each section.
Tutorial for Stenciling:
-
Step 1: Choose a stencil design that fits your space and style. Lightly tape the stencil to the wall.
-
Step 2: Use a foam roller to apply paint to the stencil. Make sure to use minimal paint to avoid bleeding under the edges.
-
Step 3: Carefully lift the stencil and reposition it for the next section. Repeat the process until the wall is fully covered.
Upgrade Your Furniture with a Coat of Paint or New Hardware
Revamping old furniture is an easy and rewarding DIY project. Whether you’re giving a dated dresser a modern makeover or refreshing a coffee table, a coat of paint or new hardware can work wonders.
Tips for Furniture Makeovers:
-
Sanding is Key: Sand the furniture to remove any old finish and create a smooth surface for painting.
-
Choose the Right Paint: For wooden furniture, a chalk paint or furniture paint works best. For metal, use spray paint formulated for metal surfaces.
-
Consider New Hardware: Swapping out drawer pulls, knobs, or handles is a quick way to elevate the look of a piece.
Tutorial for a Dresser Makeover:
-
Step 1: Sand the dresser thoroughly to remove any old finish and smooth the surface.
-
Step 2: Apply a primer, especially if you’re working with a dark piece or wood that’s never been painted.
-
Step 3: Paint the dresser with a color of your choice. Allow it to dry and apply a second coat if necessary.
-
Step 4: Once the paint is dry, replace the old knobs with new, stylish hardware.
Install Floating Shelves for Extra Storage
If you’re looking to add both style and functionality to your space, floating shelves are a fantastic DIY project. They provide storage and display space without taking up floor space.
Tips for Installing Floating Shelves:
-
Find the Studs: Use a stud finder to locate the studs in the wall. This will ensure your shelves are properly supported.
-
Use Proper Anchors: If you can’t mount directly into studs, use wall anchors to ensure the shelves hold securely.
-
Leveling: Make sure your shelves are level before drilling to avoid a crooked appearance.
Tutorial:
-
Step 1: Measure the desired height for your shelves and mark the spots where the brackets will go.
-
Step 2: Drill holes into the wall, ensuring you’re drilling into studs or using anchors where needed.
-
Step 3: Install the brackets and then place the shelves on top. Secure them with screws if needed.
Create Custom Art Pieces for Your Walls
Personalizing your space with custom art pieces can give your home a unique, artistic touch. Whether it’s creating your own paintings, framing photographs, or making a gallery wall, DIY artwork adds character to any room.
Tips for DIY Art:
- Choose Your Medium: You can paint, use fabric, or even repurpose materials to create your own art. Abstract art, photography, or botanical prints are all excellent options.
- Frames Matter: The right frame can elevate any piece. Consider mixing and matching frames of different sizes for a gallery wall effect.
- Experiment with Styles: If you're unsure of your painting skills, try simple designs, such as geometric shapes, or abstract art.
Tutorial for Abstract Art:
-
Step 1: Choose a canvas size and gather paints in your desired colors.
-
Step 2: Use painter’s tape to create geometric shapes or abstract patterns on the canvas.
-
Step 3: Fill in the shapes with different colors, layering for depth. Allow each layer to dry before adding more.
-
Step 4: Once the paint is dry, carefully peel off the tape to reveal clean lines and patterns.
Revamp Your Entryway with Simple Organization
First impressions matter, and the entryway is the first thing guests see when they enter your home. A well-organized, inviting entryway can set the tone for the rest of your space.
Tips for Entryway Organization:
-
Install Hooks and Racks: Use hooks for coats, bags, or hats. A key rack near the door can also prevent last-minute panics about lost keys.
-
Use Baskets or Bins: A basket or bin for shoes and accessories can help keep the area neat and clutter-free.
-
Add Personal Touches: A small rug, some potted plants, or artwork can make the space feel warm and welcoming.
Tutorial for a DIY Coat Rack:
-
Step 1: Select a wooden board to use as the base for your rack. Sand it smooth and stain or paint it as desired.
-
Step 2: Attach hooks along the board using screws.
-
Step 3: Mount the board on the wall at the appropriate height, ensuring it is level and secure.
Create a Cozy Reading Nook
Transform a corner of your living room or bedroom into a cozy retreat by creating a reading nook. This project doesn’t require much space, but it will bring warmth and comfort to your home.
Tips for Designing a Reading Nook:
-
Choose the Right Chair: A comfy, inviting chair is the heart of the reading nook. Look for a chair with good back support and plush cushions.
-
Lighting is Essential: Good lighting is key for reading. A floor lamp or adjustable desk lamp can provide ample light without straining your eyes.
-
Add Cozy Textures: Throw blankets, pillows, and a soft rug will make the space feel extra inviting.
Tutorial for Building a Simple Bench:
-
Step 1: Cut a piece of plywood for the base of your bench and four pieces of wood for the legs.
-
Step 2: Attach the legs to the plywood base using screws and wood glue.
-
Step 3: Sand the edges for a smooth finish, then stain or paint as desired.
-
Step 4: Add cushions or a cozy throw for the perfect reading spot.
Conclusion: Get Creative with DIY Projects
DIY home projects offer a fun and rewarding way to transform your living space. Whether you're painting a wall, upgrading your furniture, or creating a reading nook, there are endless possibilities for making your home feel more personalized and inviting. With the right tools, a little creativity, and a touch of patience, you can complete projects that will not only enhance the beauty of your home but also give you a sense of accomplishment and pride. So, roll up your sleeves, and start turning your home improvement ideas into reality!
Was This Article Helpful?
Click on a star to rate it!
Thank you for your vote!

Average Rating: 4/5 Votes: 27
Be the first to rate this post!

Latest Posts

The Role of Animal Shelters in Communities

Renewable Energy and Sustainable Development