Candle Making at Home: Step-by-Step Guide to Creating Your Own Candles
Making candles at home is a creative and relaxing activity that allows you to customize colors, scents, and styles to suit your preferences. Plus, handmade candles make wonderful gifts! Follow this step-by-step guide to create your own candles and enjoy the warm, personal touch they bring to your space.
Materials You’ll Need
Before you start, gather these materials:
-
Wax: Choose from soy, beeswax, or paraffin, depending on your preference.
-
Wicks: Pre-waxed wicks are ideal for beginners.
-
Containers: Glass jars, tins, or any heat-resistant containers work well.
-
Fragrance Oils: Select your favorite scents for a personal touch.
-
Color Dyes (optional): Add a pop of color to your candles.
-
Double Boiler or Heatproof Bowl: For melting the wax.
-
Thermometer: To monitor the wax temperature.
-
Glue Dots or Wick Holders: To secure the wick in place.
Step 1: Prepare Your Workspace
Candle making can get messy, so set up a clean, organized workspace. Cover your area with newspaper or parchment paper to protect surfaces from wax spills.
Step 2: Choose and Prepare Your Containers
-
Clean your containers to ensure they are free of dust or debris.
-
Attach the wick to the center of the container using a glue dot or a small amount of melted wax.
-
Use a wick holder or chopstick to keep the wick upright and centered.
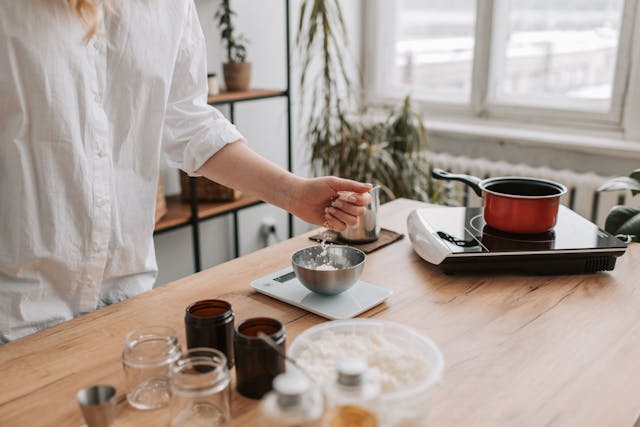
Step 3: Melt the Wax
-
Cut the wax into small chunks for quicker melting.
-
Place the wax in a double boiler or heatproof bowl over a pot of simmering water.
-
Stir gently as the wax melts, ensuring even consistency.
-
Monitor the temperature with a thermometer—most waxes melt at around 120°F to 180°F, depending on the type.
Step 4: Add Fragrance and Color
-
Once the wax is fully melted, remove it from heat.
-
Allow the wax to cool slightly (around 130°F to 140°F) before adding fragrance oils. This prevents the scent from evaporating due to high heat. Add 1 ounce of fragrance oil per pound of wax for a strong scent.
-
Stir in color dye, if desired, ensuring it blends evenly.
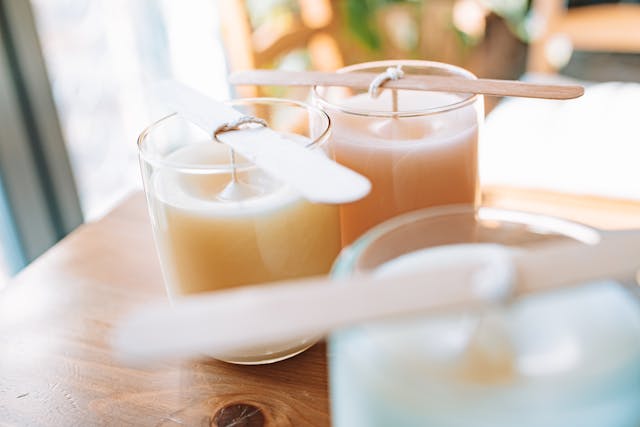
Step 5: Pour the Wax
-
Slowly pour the melted wax into your prepared container, holding the wick steady.
-
Leave a small gap at the top of the container to prevent overflow.
-
Let the candle cool and harden at room temperature. This can take several hours.
Step 6: Trim the Wick
Once the wax has completely hardened, trim the wick to about ¼ inch. This length ensures a steady, clean burn.
Tips for Success
-
Experiment with Blends: Mix different fragrance oils to create unique scents.
-
Avoid Overheating Wax: High temperatures can damage the wax and affect the scent throw.
-
Test Your Candles: Light one to ensure it burns evenly and safely before making larger batches.
Creative Ideas for Your Candles
-
Layered Candles: Pour wax in layers of different colors or scents for a fun effect.
-
Embedded Decorations: Add dried flowers, herbs, or glitter to your candles for decorative flair.
-
Themed Candles: Match colors and scents to seasons, holidays, or special events.
Conclusion
Candle making at home is an enjoyable and rewarding craft that allows you to create beautiful, customized candles. Whether you’re making them for yourself or as thoughtful gifts, this step-by-step guide ensures your candles will light up any room with warmth and charm. So gather your supplies, ignite your creativity, and get started!
Was This Article Helpful?
Click on a star to rate it!
Thank you for your vote!

Average Rating: 4.8/5 Votes: 31
Be the first to rate this post!

Latest Posts

The Role of Animal Shelters in Communities

Renewable Energy and Sustainable Development